
Apartment renovation order of works: from demolition to finish, and why waterproofing comes before tiling
An apartment renovation is a chain of stages, each one resting on what came before it. When the order is right, every trade walks onto a surface that's ready for them. When a stage is skipped or done early, you find the mistake after it's already been sealed under a tile or behind plaster, and then you pay twice.
Updated July 2026 · Nur Renovations
The short answer
The correct order of an apartment renovation is: demolition and strip-out, building partitions and structural changes, hidden plumbing and electrical services, screed and falls, wet-room waterproofing with a flood test, tiling and cladding, and finally finish, paint and fit-out. The order matters because each stage seals the one before it, so anything that stays hidden inside the wall or floor has to be done before whatever covers it. The critical point: in a wet room the waterproofing always comes before the tiling, because the tile doesn't seal on its own and the waterproofing has to sit beneath it.
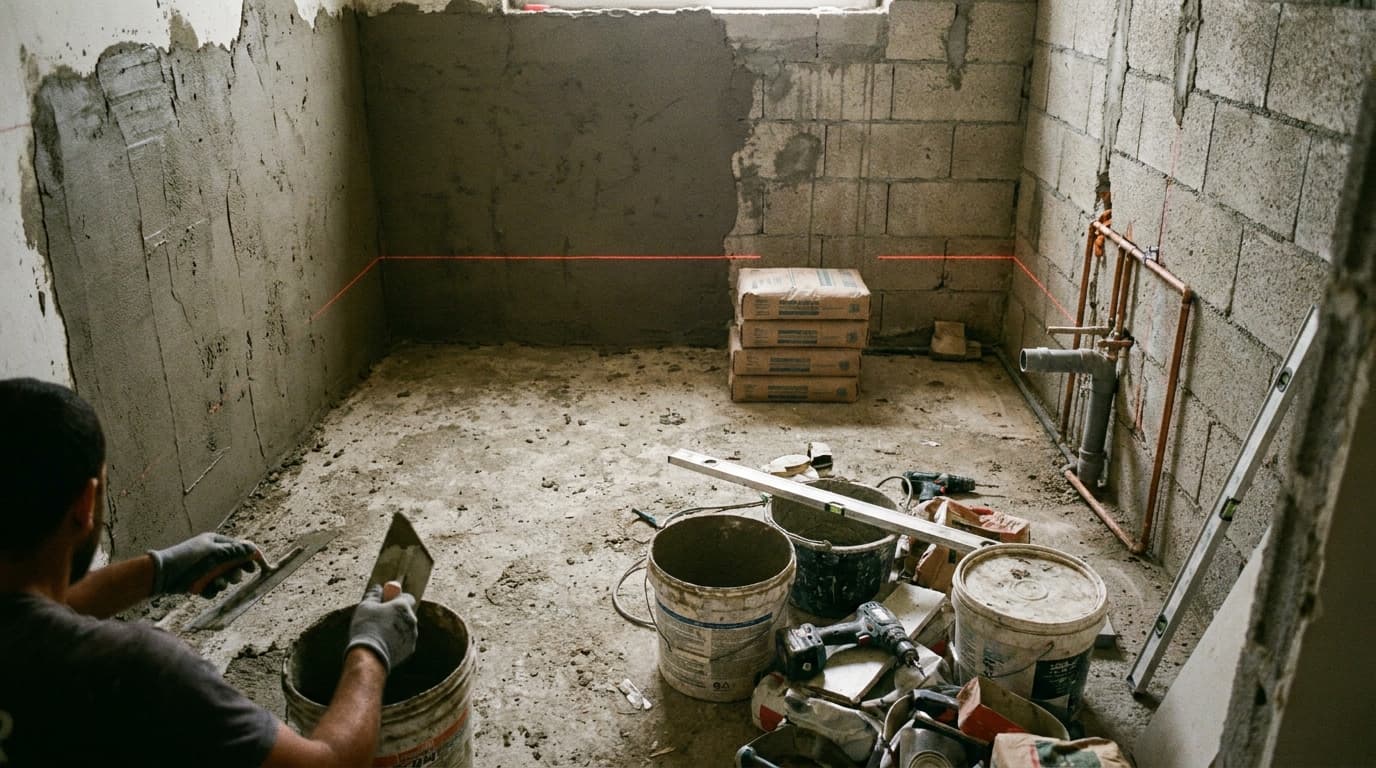
Most of the expensive mistakes in an apartment renovation aren't mistakes of workmanship, they're mistakes of order. The paint can be excellent, the tile straight and the plumbing sound, and you'll still get double work if the stages ran in the wrong sequence. The reason is simple: each stage seals the one before it. Once the floor is laid, the waterproofing beneath it is no longer reachable. Once the walls are painted, the chases that should have been cut for the wiring are already closed behind plaster.
A renovation done right is built as a chain. First you clear and strip out, then you build the hidden services that stay inside the wall and floor, you waterproof everything that will meet water, and only then do you cover it all with finish. The trades come in along that queue, and each one is handed a surface prepared for them. The tiler doesn't wait on the plumber mid-job, and the painter doesn't enter a room that's still going to be chased.
In this guide we walk the stages in order, from demolition to finish, and explain the point most people miss: why in a wet room the waterproofing has to come before the tiling, and never the other way around. How long each stage takes is a separate subject with its own guide. This one is about the sequence itself, not the schedule. For us a fixed crew runs that sequence end to end, with a transparent BOQ and a written warranty on wet work.
01Demolition and strip-out: clearing the site back to the structure
The first stage is to strip out what's being replaced and expose what's being worked on. You take up the old floor, remove fixtures and cabinets, break out walls that are meant to move, and sometimes strip plaster back to the block to see the real state of the wall behind the old finish. Without this stage you work blind, and old problems stay hidden under the new work.
Demolition is also a discovery stage. This is where you find old pipework that leaks, damp that was hiding behind a cabinet, non-compliant wiring, or a structure different from what was assumed. Better to find all of that now, when the wall is open and cheap to fix, than after it's been tiled and painted over. So we go over the exposed condition before continuing, and update the BOQ if the site turns out different from the assumption.
It also matters to separate what comes out from what stays. Not every wall is broken, and not every pipe is replaced. In a shared building there are load-bearing walls you can't touch and building-wide service lines that run through the wet rooms, and those stay where they are. We mark up front what comes down and what stays, so the demolition is focused and not destructive beyond what's needed, and so we don't accidentally open up something that's hard and costly to put back.
Watch out
Clearing the debris is part of the stage, not an afterthought. A pile of rubble left in the flat blocks the next trades and stretches the whole renovation. A clean site between stages is a condition for smooth progress.
02Structure, partitions and hidden services: everything that stays inside the wall
Once the site is clear you build what stays hidden for good. If walls are moving or partitions are going up, that happens now, before any services, because the position of the wall decides where the pipes and wiring will run. Only when the spaces are at their final size can the points be planned correctly.
Then the plumber and electrician come in. They cut chases into the wall, run water and waste pipes, pull power and data lines, and set every end point: taps, drains, sockets, switches and light points. Anything that goes into the wall or floor at this stage gets closed up later under plaster and tile, so this is the stage to decide finally where everything sits.
This is also where the floor screed goes down, the levelling layer that the waterproofing and tiling come over later. The screed is what sets the falls in the wet rooms, the direction water will run toward the drain. A fall set correctly at the screed stage is the foundation for everything that follows.
Field tip
Lock down every point location before anyone chases: shower-head height, which side the tap sits, where the sockets land above the counter. A change on paper is free. A change after the wall is chased and plastered means opening it back up.
03Wet-room waterproofing: the stage you don't see at the end
Before the wet rooms are covered with finish, they're waterproofed. In a bathroom, a shower, and sometimes a kitchen and balcony too, you form a continuous sealed envelope over the floor and over the wall in the wet zone, including the corners, the junctions and the penetrations like the drain and pipe crossings. That envelope is the home's real protection against water, and it sits under the tile, not in the tile itself.
Waterproofing is the point of no return in a renovation. The moment you tile over it, it's closed, and you can't inspect or repair it without taking up the tiling. So at this stage we work to one coherent waterproofing system, applied per the manufacturer's instructions and the Israeli standard for wet-room waterproofing, and we don't rush on before the waterproofing has properly dried.
This stage is the core of the work for us, not an add-on to it. We work with double waterproofing, and we run a documented flood test before tiling: we fill the wet area with water and confirm there's no drop in the level and no damp underneath or in the adjoining walls. Only after the test passes do we move on to tiling. The seven common waterproofing failures, and how each is avoided, we covered in a separate guide linked below.
Watch out
If a tradesperson offers to tile first and waterproof afterward, or claims the tile adhesive also waterproofs, that's a red flag. Adhesive bonds, it doesn't seal, and the waterproofing has to be under the tile to work.
04Why waterproofing comes before tiling, not after
This is the one worth understanding, because it's where the most renovations fall down. The tile and grout are not the waterproofing layer. A ceramic tile doesn't pass water, but the grout joints between tiles do, and the adhesive under them absorbs water. The water that passes through the joints reaches the surface under the tile, and that surface is the one that has to be sealed. If there's no waterproofing there, the water carries on into the concrete, into the adjoining wall and into the flat below.
From that comes the build order. The waterproofing has to be one continuous layer under the tile, running across the floor, up the wall in the wet zone, and wrapping the drain and pipe penetrations. You can't form a continuous envelope like that after tiling, because the tiling covers the exact surface that needs sealing. So the waterproofing comes first, is checked by a flood test, and only then is the tile laid over it as a finish and protection layer.
When it's done backward, tiled first and then waterproofed over the tile or in the joints alone, you get a surface seal that holds until the first grout joint cracks. Then the water goes under the tile to a surface that was never prepared for it, and spreads sideways with nothing showing on the surface. By the time the stain appears on the neighbor's ceiling, it's already far from the entry point, and the repair means taking up a whole floor to reach a waterproofing layer that was never there.
- The tile is finish and mechanical protection. It doesn't block water on its own
- The grout joints and adhesive pass and absorb water to the surface beneath
- The waterproofing is the continuous layer that stops water, and it has to be under the tile
- After tiling, the waterproofing can't be formed or repaired without tearing out
05Tiling and cladding: the hard finish over the substrate
Only after the waterproofing is checked and passes do you start tiling and cladding the walls. At this stage everything beneath is already closed and tested, and the tiler works on a prepared surface: a correct fall, continuous waterproofing, and treated penetrations. So the tile sits on a stable base, and the grout stays a finish line, not a last line of defense.
The order of works continues within the tiling too. You usually tile the floor and walls before fitting the sanitary ware, cabinets and shower glass, because the fixtures connect to a finished surface. The rule here is the same: each element comes in after the surface it connects to is ready, not before.
06Finish, paint and fit-out: the last stages in the queue
Last comes the visible finish: filler and paint on the walls, fitting doors, joinery and cabinets, the final connection of sanitary ware and taps, and installing light fittings, sockets and switches. These are the stages most sensitive to handling, so they come last in the queue, after the 'dirty' work of demolition, chasing and tiling is behind us.
There's an order within the finish too. You usually paint before the final fit-out so you don't mark new fixtures and joinery, and you leave the last electrical and water connections to the end so they aren't damaged during the work. When the sequence is kept from demolition to this point, the final stage really is just finishing, not repairing something that was closed too early.
This is also where the loop closes with the client. We go over the finished flat against the BOQ, confirm every item was done as agreed, and hand over the written warranty on wet work. A fixed crew that ran the whole chain is what lets us stand behind every stage, not just behind the final signature.
Field tip
Plan the orders ahead by the queue: tiles, sanitary ware, doors and light fittings need to arrive before the stage that installs them. A material that's late stops the whole sequence, even if the crew is free to work.
Planning a renovation? Let's lock down the order of works
A site visit, a transparent BOQ that sequences every stage by the queue, and a fixed crew that runs it from demolition to finish, with a written warranty on wet work.
Site visit & quote